We bought these school chairs here and recently decided to freshen them up with a lick of white paint. Here's the before and after shots along with some shots I took as I went and then a finished chair in our spare bedroom.


 I made sure my strawberry plants were well watered and left them to drain for a bit...
 And then finally I planted them - I half-filled the space with multi-purpose soil, removed the plants from their pots and sat them inside before filling around with more soil, packing it fairly well. I split one of the plants in two and poked them out the sides too - we'll see what happens there! Finally, I gave the whole thing a good water with some tomato feed diluted in there.
 Just need mart to screw it onto the wall for me now!
 There isn't much of our homemade elderflower cordial left so I quickly made up a small bottle of it for our neighbour, Mrs. Kelly. She was bemused to see me dangling from the tree and wondered what I was up to. She's very sweet and I can't wait to make cakes for her too once our kitchen is sorted (yawn).
 It's pretty quick and easy to run up some napkins, never mind how much cheaper it is than buying them and also the fact that you can make them to your own style and colour scheme. Choose a heavyish cotton or a linen - it's wise to test a little in the washing machine for shrinkage or colour loss. Cut out about 30cm squares and embellish them if you like. I simply machine sewed on some ribbons and ric rac but you could applique, embroider or print a design on either for example.
 Iron the trimmed corners in by the same depth also. If you are not very confident at machine sewing, then tack (large hand stitches) the hem down to stay in place.
 Turn the edges once more (just a little deeper than the last turn, so I went about 7mm). Pay extra attention to the all important corners so they sit together nice and neatly (or as neatly as possible at least!) - you have just made a mitred corner! Again, tack the edges down to secure in place for machine sewing.
 Almost there now! Machine sew the hem in place, turning the fabric around at the corners (leaving the needle in the fabric as you do this). Remove any tacking and give a good overall press with the iron.
 Fold the napkins neatly and voila and you're done!
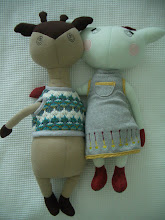
 Green rug - M&S, white waffle duvet & pillow slips - Dunnes Stores, Petulia & Jeremy bears - Habitat, black & white cushions - Ikea, stripey pillow slips - Oxendales, bed - M&S, hydrengea wallpaper - Villa Nova from Home Couture.
 Rug & sofa - habitat, blankie - Dunnes Stores, cushions - Homebase, Debenhams & Ikea, Shutters - Shutters of Ireland


